Tuesday 20 December 2011

Vintage and Handmade Fair, 10th December 2011

So, I got up stupidly early on Saturday 10th December to make sure I had everything packed. 7.45am I was ready and packed the car and headed to my friend Meryls house. Mel had provided everything for my table to make it look beautiful and had offered to come to the hall and help me set up. When we got there the Hall was set up with about 45 tables downstairs and the rest upstairs. We hunted around in the main room looking for a table with my name on it. Disappointment set in as I realised I was upstairs. We lugged everything up and there was my table, in a room with 6 others. We set my table up and it looked beautiful!! My sister arrived in time to get changed into our 'Pinkys Cards' t-shirts and then the customers started coming in. There was a good trickle of customers for most of the day, but there were also big periods when there was no one apart from us sellers up there!!


(the beautiful Mel - Home Grown Bride, looking very proud of the table!!) 

Apparently our fair was on the same weekend that Woburn and Bletchley had got their handmade fairs on too. On top of that, Milton Keynes had got the Red Bull racing cars down, racing around the city centre, this meant there were a load of roads closed for the racing cars to use.  knowing this now, I understand why the fair was a quiet one!!!
HOWEVER I think that for my 1st fair I did bloody well!! I made nearly £60 and gave out LOADS of business cards!! I even had some interest for wedding stationary!!! so I am very positive from this experience!! I met some lovely people and have the beginnings of hopefully some good friendships.

my favourite part of the fair:
a couple of girls were browsing at my stall and I asked them if they were looking for anything in particular. 1 girl said she was looking for a card for her grandfather. So I chatted with her about what sort of things he likes and after a minute or so she stood up looking disheartened. she said he had some sort of problem where he could only really see the colour yellow clearly. I routed around in the boxes behind my stall and pulled out 2 cards I had made in yellow. her face lit up. It was the same design as the cards she had been looking through, I had done them in all non Christmassy colours but hadn't put them out on display. she gave me a huge grin and told me that it would make her grandfathers Christmas receiving a card he can see clearly. that made me feel so warm and fuzzy inside!!!

I'm looking forward to the next fair, one where i wont have to focus SO much on Christmas cards! My tattoo range went down a storm so will have to look into investing in a few more Bombshell stamps methinks!!!

OK, well that's it for now. will try and blog again before Christmas - have slipped a disc though so I'll have to see how I'm feeling!
Big Love - Speak soon!xxxxx

Friday 9 December 2011

Prep for the Fair and a Vintage beauty...

Hello!!!
I have been a bit quiet on the blogging front recently - mostly because I have been working my socks off to prepare stock for the Vintage and Handmade Fair I am selling at tomorrow!!!! I have done 100 Christmas cards and am now working towards finishing the non Christmassy cards, I have done 51 so far. This is the 1st craft fair I have ever done and it is safe to say that I am royally poopin myself about it!!! Who knew selling cards would be so scary!!! This is an idea of what the stall is going to look like - 


The fair is at Millmead Hall, Wolverton, Milton Keynes - 10th December, 10am - 4pm. It is going to be an awesome day out, just in time for any Christmas shopping you need to do. There is over 50 stalls including MINE!!!!! Here's a little sneak peek at some of the stuff I'll be selling....


On a non-Christmas fair note....
I took some of my cards into work and a colleague asked if I could do a special card for her daughters 16th birthday. Of course, I said! After listening to what the birthday girl was into I did a quick sketch of the card I had in mind.


I sat down and started on the circle that was going to make the easel part of the card. Quite quickly my design evolved from an easel card into a standard single fold to give the design more space.  I have used a Kraft card base, Tim Holtz Vintage Shabby cardstock and elegant flourish die, some Prima flowers, sticky pearls and some buttons. The numbers are from Tim's Carnivale alphabet that I have triple embossed using silver embossing powder. The pink cardstock was torn into a square, screwed up, flattened out and sanded. I think it creates a lovely vintagey look.


This  is my 1st vintage style card, believe it or not!!! I'm shocked that I have managed to go this long without making one - Vintage is EVERYWHERE atm!!! I think it turned out really well!! I'm super pleased with it and hope the birthday girl will be too.
Would love to know what you think of it!!! please leave a comment!

So that's me done for another post, will write again after the craft fair - hopefully will be taking lots of piccys!!!

Speak soon. Big Love.xxx

Wednesday 9 November 2011

I said YES!!!

Hi guys!

I have the most wonderful news!!! My boyfriend of 6 and a half years proposed to me on the 25th October - and I said YES!!!! I can't believe it!!! Even though I have the world's most beautiful ring on my finger - it still doesn't feel real! I'm sure once we start having to pay for expensive things like venues and flowers then it will all start feeling scarily real :)


I get to make my own wedding stationary!!!! WOOOOOO!!!! Ever since I made those 1st wedding invites (for who is now my soon to be sister in law!!!) I have dreamed of making my own. I always knew exactly what I wanted (I didn't know what colours but I knew the style) but now its official and I am ACTUALLY gonna get married.....I have NO idea what I want!!! lol. There is SOOOO many ideas to choose from!! 

I LOVE the typography 'carnival' style stationary that's out there atm... but I also like the classic simple look aswell.... then there is are colours to think about.... and a theme!!!! OMG. I feel like a kid at Christmas... but also like my head is gonna explode with all this planning to do. Got another couple of years to do it in though - looking at setting the date around autumn time 2013.

oh well, I'm sure there will be many more wedding related ramblings before then :)

so, I've had a couple of weeks to myself to celebrate getting engaged, now I'm gonna get my bum in gear and get cracking with some crafting! :) I've been working hard at the Christmas cards, i am now in reach of my 100 card target. Very proud of myself. Hopefully I will get them done with time to spare so I can knock out some 'non Christmas' cards to take aswell!


well that's it for now lovelies! keep your eyes peeled for the next post - will have sneak peeks of some of my Christmas stock coming soon!!!xxx

Wednesday 19 October 2011

Matchbox Advent Calender

I fell in love with a christmas tree shaped advent calender in paperchase last year (and being told that i wasn't allowed to spend £20 buying it) i was on the hunt for something similarlly amazing this year. i came across the advent calender from Kaiser crafts whilst flicking through the latest Cards and Papercraft magazine...i have fallen in love again!! however... i don't want to spend alot of money to then have to spend more cash on stuff to decorate it with. i had a quick look around on google and saw a few versions of a 'matchbox advent calender' and thought it was really cute (and a LOT cheaper than the kaiser one) so decided to give it a go. I'm not going to do a step by step tutorial... but i have put on lots of photos. if you have any questions, lemme know, I'll answer them as best i can.


I found using double sided tape worked really well for this project. I'm quite impatient and glue takes too long to dry. lol.


1 layer gives you 12 boxes, so for the 24 you need to make 2 of these layers. you could make this advent calender with boxes you have made yourself to give each box a bit more depth but not only am I impatient, I'm lazy too :) in case you're wondering - I gave all the matches to my friend who is a science teacher... those Bunsen burners don't light themselves!!


I found that covering each tray in paper made them very tight in their box, so I used promarkers to colour the tray so they blended in with the rest of the calender when they were pulled out.


I did originally think of using brads as tiny little handles to open each drawer with...however, I found that if you didn't have longish fingernails to get behind the brad it was quite hard to open!!! so I decided to use bakers twine looped though some holes and knotted in the front. The matchbox itself isn't made of very think card so I reinforced the front of the tray with a strip of thick board and then used my crop-o-dile to punch the holes. 


I used the same technique here for the numbers as I did for colour coding my promarkers. check out the post 'promarker and stamp storage' for details.


I used clear cellotape to attach each stack to the one next to it, I did this on the top and bottom of each set of 3. I think when I make the next one I will cover all around each stack of 3 matchboxes with patterned paper rather than just the exposed side. Although it doesn't look bad, I think by covering all sides in paper will give a neater finish.  


the top and bottom are made out of the same thick board i used to reinforce the trays, cut slightly larger than the matchboxes.


I trimmed the bakers twine down to just behind the knot, giving a neater finish - also I was finding that the longer ones were getting caught in the tray underneath when it was opened and closed :)


so that's my finished advent calender!! I have to say I am VERY happy with how it turned out.... super cute!! 
please leave a comment and let me know what you think!xxxx

Friday 7 October 2011

"Sing us a Song, You're the Piano Man..." - music inspired card

Hello lovelies!!

I thought i would put up a post about a card that i have just finished making, it's a bespoke card for a customer who wanted a 18th birthday card that had something to do with music. the young lady it is for has achieved grade 8 on the piano so I thought that was a pretty good place to start. 

I used a 12.5x12.5 card and replaced a 5cm strip from the bottom of the card with acetate.

I then cut some black card into 1x3cm strips and some white card into 1.5x5cm strips. these pieces are going to form the piano keys. using some tiny clear gems I created the number 18 on one of the white strips.


I used the acetate for the backing of the piano as the white keys would have been lost stuck to white card and I didn't like the harsh look of the white keys on black paper.  by sticking the keys onto the acetate it meant I could add patterned paper on the inside of the card and add that bit of dimension and interest. the white keys are stuck with double sided tape to the acetate. I don't like the look of craft glue through the acetate so I prefer using the tape, I think it looks alot neater. I stuck the black keys on using foam pads to add some height.


I found a lovely digital stamp background of some music that was perfect for this card. (I have no idea what site it was from - sorry!)  I resized it in Word and stuck it to my card. a few touches here and there, the black strip above the keys and a gem on the sentiment and that's the card done!!


because this card is for an 18th birthday I decided to box it rather than put it in a standard envolope. I love putting cards with matching envolopes/boxes. I think it just adds that something special and finishes the card of perfectly.  this in mind, I used the same digi backing stamp and again, resized it in word to the size of the box lid. I tried to put the box lid through the printer but unfortunately it was too thick so I printed it on paper and then stuck the paper to the lid.
I lined the inside of the box base with a long strip of tissue paper layered over a piece of ribbon  so the card could be wrapped and tied in place.


I finished the whole thing off by adding a name card and another piece of the ribbon that I used inside the box. the ribbon is tied in such a way that it can be removed without undoing it (so that you can write your message in the card without worrying about recreating the bow when your done :)
I think it is beautiful, I couldn't be more pleased at how it turned out. It's a unisex card too - would be great for a male or female!


well peeps... now i have done the card  i think im off to bed. my eyes are aching from working in what feels like a dark cave!!! think a daylight lamp is deffo going on the christmas list this year :)

night all, speak soon.
xxx

Wednesday 28 September 2011

Promarker and Stamp storage ideas...

Hello peeps!
the past couple of days I have been sorting out my craft room to try and turn my creative bombsite into some kind of organised crafting heaven :)

I have to say from the start that these storage ideas are unfortunately not my own original sparks of brilliance - they came from a discussion with some crafty friends  and from searching the internet for storage solutions! anyway - they worked for me, so I am sharing them with anyone who wants to use them!

PROMARKERS
I LOVE my promarkers but I quickly loose patience when I end up pulling the same colour out of the box umpteen times. so I have colour coded them. not a new idea, i know, but i found it really useful :)


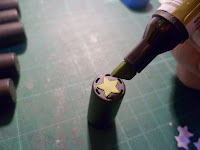
I picked a cute star punch for the top of each pen lid. next I used double sided tape on some white card and punched out the stars. ta-da!! peel off the backing tape...sticky stars! I used the same white card that I use when stamping, so that the coloured star shows the true colour it will be when used to colour my images…


next I stuck the stars onto the flat topped promarker caps and coloured them in. i found it easier to colour the stars after they were stuck on the lid - much too fiddly when they weren't stuck down.


now all my promarkers are labelled and I can see exactly what colours they are without taking them out of the box!!! WOOOOOO!!!


also - on the side of my box I have cut out the colour chart that comes with every pack of pens and glued it to the side. I've then marked off which pens I have. useful for when I'm looking at buying new sets and need to know which ones I haven't got! :)

I think when I get more I might look into something a little more organised than my box... I found a clip on YouTube where a woman used a CD holder from Tesco. VERY good idea - take a look!!!


CLEAR STAMPS
This will work with ANY stamp that you use with an acrylic block...

I got hold of some CD cases and took the black bits out of the case (the bit the CD snaps onto) so I was left with just the clear outer bit.

I took my pack of stamps and put them into the case - the 'cling' of the stamp sticks to the plastic like it does to an acrylic block. I then numbered the case using a Sharpie.

next, I stamped everything in that case onto a sheet of A4 paper and numbered the page. I did this with all of my clear stamps, and my stamps with Kling-On foam.


I put all the sheets of paper (in number order) into a ring binder. I now have a very organised number system for my stamps. The chaos that was my stamp drawer is now a very nice looking set of 3 boxes on my shelf. I bought the boxes from Instore for about £3 each. each box holds 20 CD cases.


since doing this I have found that I use SO many more of my stamps - before I only ever used the stamps on the top of the pile... I had NO IDEA what I had. now I have a quick flick through and I can see everything I own... and the actual stamp size too!! UBER useful!

I have also done a few pages in the front of the ringbinder for my embossing folders too... it's nice to know what you have and what it looks like so by having pieces of the embossed paper in the folder it makes it a quick easy reference.


really hope these ideas are useful - they were for me :) lemme know if you have any crafty storage solutions too - post a link or a piccy! always looking for ways to make my crafting life easier! :)


That's it for now... will have to tell you about my scrap box solution another time!x
keep crafting - speak soon.xxx

Saturday 24 September 2011

Tattoo Themed Cards...

hello lovelies!!
have had a good week - got cracking with my xmas stock last weekend and got quite alot done!! well, 20 cards done. but that means that I only have 80 to go!! :) shouldn't take that long! *giggles nervously* if only I didn't have a full time job to get in the way of all my crafting!

I've been playing with biggy ALOT since I got back from holiday...suddenly all those dies and embossing folders I have actually work and look good!! it's nice not to have to pack underneath them with pieces of paper to get the right thickness. as a treat I bought myself 3 sets of the Sizzix Framelits.... LOVE them!


I bought 'Fancy Labels' , 'Tickets' and 'Circles'. I would personally say that the circles have moved their way into my 'essential' crafting kit!! I can't remember how many times I have tried to find something round to draw around... its either too big or too small...then there is the issue of cutting them out! never very circular when I had finished with the scissors!! these Framelits are AMAZING and I WILL be buying the other shapes when payday rolls round! :)

  
I had a nice break from xmas stock today - had an order for a male birthday card - theme 'tattoo'. I have some awesome tattoo stamps that I bought from Artful Splodger however, I felt the main stamps were a little too girly for my central image so created my own tattoo image. I used the star stamp from the Bombshell collection for the star banner at the top. I downloaded a free tattoo font from the internet and printed out the 'happy birthday' onto the same paper as I used for the background. 


I then cut out some wings and the heart and used foam pads to give the card some dimension. for a final touch I added a ruby coloured gem to the heart. I am VERY happy at how this card turned out - so much so I am gonna knock some more of these out and take them to the craft fair in December!!! there is a definite gap in the market for these tattoo themed cards!!! 


I do love my Bombshell Stamps to pieces so I thought I would show you some of the cards I have made using them - I love the retro tattoo look... lemme know what you think!


well, I think that's about it for now. 
keep smiling, keep crafting, speak soon.xxxx

Thursday 15 September 2011

I'm Back!!

Hello lovelies - gotta apologise for not posting anything for a while, came back from a well deserved holiday yesterday. Spent a week de-stressing and relaxing in the sun in beautiful Portugal with the OH. Now I'm back and can begin focussing on getting some stock together for the Christmas fair.

Oooooooooo - I BOUGHT A BIG SHOT!!!! Just thought I would let the world know that!!! I'm SOOOOO excited!! I bought it just before I went away so haven't really played with it much (that's this afternoon sorted!!) but can finally emboss and die cut things properly!!! (I bought a Quickutz Revolution on some bad advise a few years ago and have regretted it ever since.) WOOOOOOO!! My Sizzix framelits arrived while I was away too - time to go play I think!

It's a short post but I will endeavour to post again in the next few days. Gonna go play with 'Biggy' now!! :)

Speak Soon.xxx

Wednesday 24 August 2011

Butterflies and BRILLIANT NEWS!!!

I have been meaning to write on my blog for the past few days. Unfortunately there always seems to be something UBER important that needs to be done. This week that thing has been the wedding name cards for a customer order.

THAY ARE FINISHED!! I am pretty happy how they have turned out actually - I went against all my better judgement and did a non standard size place card - main reason for this was the Butterfly punch.


It's a Tonic Studios punch; I lusted after it for months! it is a little expensive for what it is but it is SOOOO pretty!! Although I love this punch SOOOO much it is a bit of a pain in the bum - it doesn't punch very far into the paper. I could have punched the butterflies and then cut them out and restuck them on but I REALLY liked the effect with the butterfly punched in the cardstock and then the card folded down behind it. To have the butterfly central meant the card had to be a bit of a random size but I don't think that matters too much.

I used 3 different sized gems to form the body of the butterfly; navy 5mm, aqua 4mm and clear 3mm. the dark blue card that the names are mounted onto is just stock card I had from hobbycraft.

I wanted to make the Bride and Groom cards a bit different and a bit more special so I added the accent gems onto where the names are printed.


My sister has fallen in love with this design, so as and when she gets married I can go nuts and do all her wedding stationary in this style!!! looking forward to it!!!

On a completely different note, I have some FANTASTIC news - I will be selling my cards at the Vintage and Handmade fair in Wolverton, Milton Keynes... IM SO EXCITED!!!!! this will be my 1st fair ever!!! (and hopefully not my last!)

I'm getting all giddy like a kid at Christmas - have been searching the internet for images and tips of what a good stall should be like. Also been looking into getting some business cards. It finally feels like things are starting to go my way!! about time I reckon! :) so plan for the next 108 days.... get busy making some stock for the fair!!!

Well, i think that might be the OH home from work - so i best go put the dinner on!! :)

Speak Soon.
xxxxx

Saturday 13 August 2011

Where has the week gone?!?

I cant believe a week has gone by already! time flies when your having fun as they say!!

I felt a bit like Santa this week, I did a card delivery on Thursday evening to a few of my customers, felt lovely taking them to each person and seeing the look on their faces when they saw what I had made for them :) got that warm fuzzy feeling inside that makes me realise that making cards is what I want to do full time!

I promised myself this month that I would try and not spend any money on crafting....oh, how I failed!! my friend added me to a facebook page for crafty sellers to sell their stuff. *shakes head and sighs* I spent so much money - however - I do now own 4 packs of the Flippin Men stamps and a new set of Woodware 'Vino' stamps. I'm hoping male cards will be easier now I have some men specific stamps!

Also I got an email from madaboutcards.com saying they had free postage if you spend over £20....it had to be done!! so 2 packs of papermania capsule paper and a big 'born to shop' hamper later.....
I'm whippin up some 4-card-sets using the Born To Shop stamps now. If I use them - I cant be angry at myself for buying them!!!

Gotten as far as I can with the wedding place card order - all cards made, just waiting for gems to arrive from eBay and then the list of guests names from the bride to be. will post a piccy of said cards after the gems are stuck on.

craft wise that's about it for this week - ooooooooooooooo, apart from being 1 step closer to the wedding photo shoot!! my wedding planner friend and I are planning to do a photo shoot showcasing what we can do. I asked another friend (who bakes amazing cakes) if she would like to be in on the shoot and she said yes!!! with my stationary, Rachels cakes and Mels beautiful accessories... these photos are gonna look amazing! :) organised a meet up to share ideas for a couple of weeks time. EXCITING!!!!

that really is it though tbh. bit of a boring blog this one guys - sorry.
thanks for reading it though. :) I'm off to make more cards.
speak soon.
xxx


Saturday 6 August 2011

Babies, babies, everywhere!

Hey peeps - thankyou to everyone who is following my blog so far!

today I have been mostly working on a baby card for a customer. Have done a few baby cards recently - there has gotta be a baby boom going on! - but all the cards I have done have been for boys, so you can imagine how I squealed in excitement at the thought of using pinks and  lace and flowers!!!

Its finished, well, as finished as it can be...the blooming printer decided to run out of ink so I still have to print out the baby's name, birth date and weight for the frame on the right, but its as finished as I can get it for the moment :)

I went for a trifold card (one of my favs to make) in a baby pink using cream card to stamp on. took a chance on rounding the corners off - 1st time I have done this on ALL the corners...glad I did. think it gives a softer look to the card.


(they are a bit dark - my craft room light is AWFUL!!!)

I incorporated some Tim Holtz idea-ology tickets as the customer wanted the card to complement a present they had bought - a cute 'admits one to the world' framed ticket from notonthehighstreet.com.

I got to use my Martha Stewart edge punch too - LOVE IT!!!! soooooooo pretty! Roll on next payday...got my eye on the double loop round the page set! lol

oooooo - incase anyone is wondering... the panel in the middle - the white tab with the ribbon comes out and unfolds to give a nice 'secret' area to write your message :)

well, I think I'm going to go and rest my weary eyes now. Thanks for reading my ramble guys! 
speak soon.xxx

Friday 5 August 2011

Look at me!! I Have a BLOG!!!

My 1st official entry on my brand new blog - how exciting!!!
where to start!! I guess the beginning is as good a place as any :)

I have always been creative; I love making things and altering things and I love the challenge of creating something beautiful from something ordinary...

When I finished Uni 5 years ago I came out looking for a job where I could express my creativity. I never did find the highly creative/artistic job that paid me to have an amazing time crafting all day - I ended up in front of a computer 9-5.

I needed a creative outlet to make up for the fact I had a boring desk job.....so I started making cards!! That's right - admin monkey by day....come 5pm I am a creative, artistic goddess! LOL!!

5 years later and I am still making cards and am still loving it! (still in the 9-5 desk job too!!) 5 years of building skills, techniques and confidence, coupled with the lovely comments I receive about my handmade items have led to me recently deciding to start selling the cards I make. I have branched into Wedding stationary too.

Its the start of my own business, an adventure...Hopefully, this will turn out to be the job that pays me to glue, stamp and emboss all day!!!
speak soon.xxx