Showing posts with label promarkers. Show all posts

Friday, 20 June 2014

Tiddly Inks!

Ive fallen in love with some digi stamps from Tiddly Inks - mainly 'Thanks a Latte'

Those girls are so damn cute! And it's such a versatile image!!

I slipped a disc last week so have been off my feet for a few days - perfect time to colour some digis!!


Always a fan of bright, colourful hair - I tend to do unnatural colours 1st. Loving the red and blue!!


Next I had a bash at a sepia style image using only browns and creams. Think I did quite we with my limited range of promarkers!!


I then tried a more 'realistic' colour palette, with a blond and a
Brunette. 

I LOVE this image!!!

Friday, 25 April 2014

Digis, digis everywhere!

Whenever I print a digi out for a card I always fill the rest of the a4 card with other digis to colour and use at a later date. These 'spare' digis get put in a basket in my desk... They have built up quite a bit!!

Well, I finally got round to colouring my digis!!!

I always find if easier to get a couple of coordinating papers and then colour the image according to the colours on those papers. I put the images and the papers in separate envolopes to keep everything together.


Here are a few of my favourite digis - I love saturated canary images!! You can see that I've matched the colours to the papers. 


Now everything is coloured it's just a case of making up each card!! Here's a few I've done. Enjoy!x


Friday, 3 August 2012

Calling all Crafters....Coated Card Bargain!!

To Do: find some decent coated card that wont bleed my promarkers!!
ACHIEVED!!!

I went searching the craft forums looking for some recommendations on what type of card to use - the name that kept cropping up was Ryman - so I googled and found the website. This card has been recommeded for Promarkers and Copics, so it cant be bad!! It is coated so enables the pens to blend easier than matt card, which sucks up the ink like a sponge.

Their card is on a 3 for 2 offer this week AND for this week only they are offering free next day delivery on ALL orders!!! This was an offer too good not to take!!! I bought 3 packs of 50 A5 white coated card for £7.98. bargain!! Personally thought I would be less wasteful with the A5, I should be able to get 2 images on each piece so SHOULD end up with less 'scrap' card.

The next day delivery is on all orders completed before 5PM. Wooooo!! thats me!! Cant wait to use it - gonna be weird seeing my digis with white eyes.... so used to seeing the skin tone bleed up into them!! LOL!!

Also - on a non promarker note - I think I may be doing another craft fair!! Its a Christmas Fair, its at the village hall opposite my house! (*shudders* its only August....shouldn't be thinking about christmas yet) My OH brought the poster home yesterday to show me and it says there are still stalls available. will look into the price/day etc... if I do go ahead with it I think I might make some of the matchbox advent calenders! :)

hope you take advantage of the free postage and 3 for 2!!!
Speak soon!xxx

Wednesday, 1 August 2012

Practice makes Perfect!

Ok, so my mission to practice colouring hair using promarkers has started! I did a bit of looking on the web yesterday for tutorials and tips on how to achieve a nice effect, and came across this hair and skin tutorial on the Letraset website. It uses a Gorjuss girl image and shows how to colour hair, skin and clothes to create highlights and shadows.

I printed off my 4 Saturated Canary girls and had another play...

hair: antique pink, cocktail pink, blush.
skin: ivory, oatmeal

hair: tan, pastel yellow, buttercup
skin: ivory, blush

hair: cocoa, tan, caramel
skin: blush, oatmeal

hair: cool grey 1-5, black fine liner
skin: ivory, blush

I have tried to do different hair colours and skin tones to experiment with the colours i have, and have come to the conclusion that i need more skin tone colours!!!

considering my last attempts I have to say, I'm quite pleased with myself!! I think I am definately getting better at colouring! The highlights and shadows add such depth to the images and really make them stand out. Think my fav is the blond hair. VERY happy with that!!

one thing I have noticed now that I am blending colours more is that the promarkers bleed alot on this card....think I need to make a trip to get some better quality card and some more promarker colours!!! :)

Speak soon.xxx

Sunday, 29 July 2012

Bits and Bobs...

Its been a bit all over the place recently on the card making front, I have done a wedding invitation order, am working on quite a few male birthday cards and have had ALOT of fun with some digi stamps from Saturated Canary.

The invites were a joy to make - it was lovely to be able to work on some wedding stationary that wasn't mine tbh!!! I was given the brief of black and white damask with dark red as an accent colour. I made a range of different styled invites for the couple to look through and then from those they picked the invite they wanted. After a lot of emails and messages back and forth between me and the bride we finalised the font, wording and layout to exactly how she wanted. 

The black, white and red combo looked stunning on the final design, definitely a combo I'd like to work with again.


The male birthday cards are still works in progress so once they are finished i will post some piccys - working on two 80ths (for the same man) and an 18th card. I always find male cards quite difficult to do, so this is a challenge for me to say the least!! A fun challenge though!!


I had my eyes opened to the beautiful world of Saturated Canary by a friend this past week, who alerted me to a free digi stamp on the website. The digis are gorgeous!! - and SOOOOO fun to colour!!
I have 4 digis from them and I had a bit of a play with them today!
(I apologise for the crappy lighting in the photos!! NEED to get a decent light in here!!)
i used the circle framelit as a template to curve the clear stamp sentiment. 

thought this would make a beautiful card for a bridesmaid to give to a bride...or visa versa!!

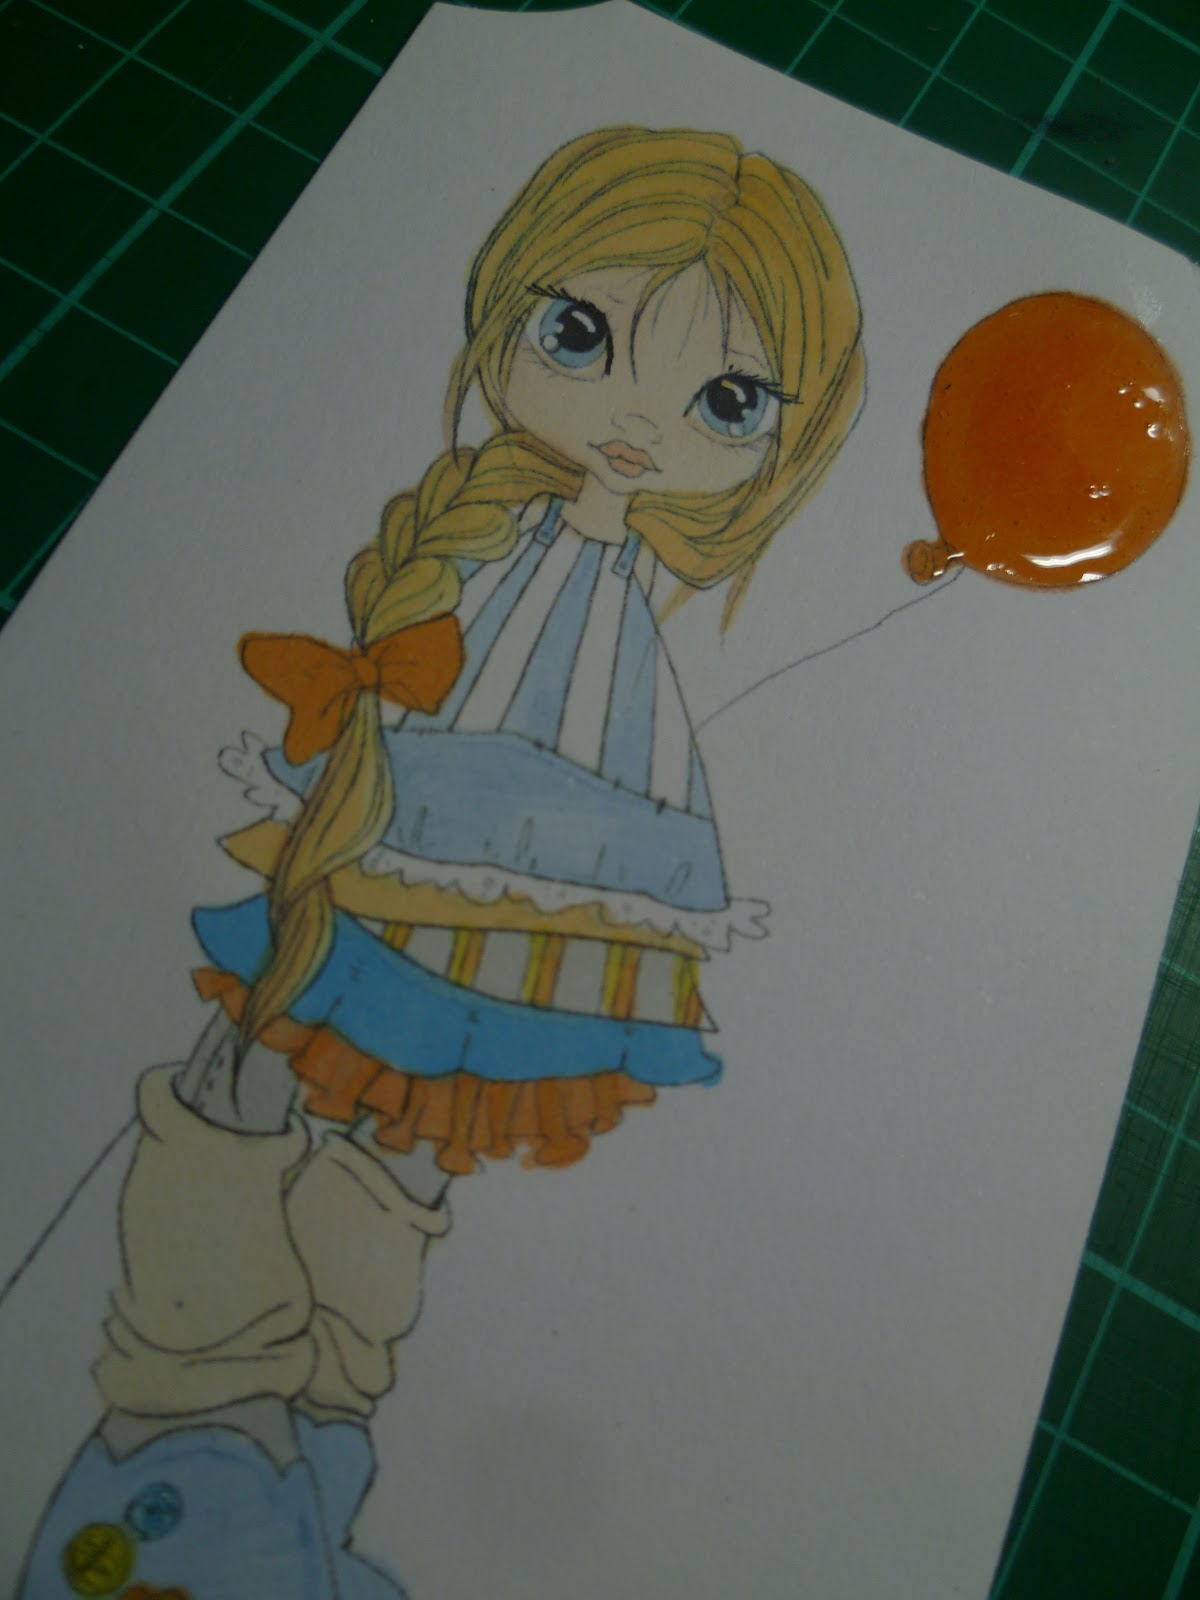
am COMPLETELY in love with this digi!! everything about her is gorgeous!! including her cute kitty!!

I have used glossy accents on the balloon to give it dimension and shine. 

the HUGE eyes make these girls SO pretty!! and the quirky clothes allow you to go wild with the colour! I need more of these digi's in my life.....and so starts an unhealthy obsession with Saturated Canary digi stamps!! there are so many on the website - you can check them out HERE.

so thats what i have been up to recently! think I'm going to go and print some more of these digis off and colour some more :) - might work on colouring hair, haven't got the hang of it yet!!

By for now - speak soon.xxxx

Sunday, 8 January 2012

Happy 2012!!

HELLO - and happy new year!!! I hope all of you got what you wanted from Santa!!!
Sorry I haven't posted in a while, I haven't been a very well bunny!! ....After the Christmas fair I was feeling awesome for about a week… and then I slipped my disc. Bloody typical – I'm just thankful I guess that my body had the decency of waiting until after the fair was over. The back injury literally put me flat out of action until the New Year. I was on horrendous amounts of strong painkillers so Xmas and New Year are pretty much fuzzy memories. I did have a fantabulous time though – this year is the 1st year in our relationship where me and the OH have actually spent Xmas DAY together!!!! I am usually in Portugal seeing my parents and he is usually working. Not only did we spend Xmas day together – we also spent New Years Eve together too!!! 1st ever midnightNew Year kisses!!!! So this festive season has been SO special because on top of all that – it is my 1st as an engaged girly!!

ALSO - I have given up smoking!!! After puffing away for more than half my life (awful considering I’m only 27!!) I have given up. Had my last one at a few mins to midnight, New Years Eve. Its going ok so far – hard, but that means its worth doing!!! 

Now for something a little more crafty.....

I bought a magazine at Morrison’s the other day and it had these cute free stamps on the front.  Having not been able to sit for the previous 2 weeks with my back - and trying to find things to do to curb my nicotine cravings – I jumped at the chance to have a play with these lovely floral stamps.


 Here's what I came up with. I knew I couldn't sit for long (back is still giving me jip) so I stuck to a basic design and had a little play with my pro markers. I kept to the same image on each card, only changing the colours. I'm pleased with how they turned out!!! 


I picked the big corner floral stamp to be the focal point of the card and also used the ‘with thanks’ stamp from the same set as the sentiment. I used my Sizzix framelits to do my circles, raised the mounted sentiment on foam pads and bish, bash, bosh I had 4 cards in next to no time!!!


I have said to myself LOADS that I am going to do this ‘set of 4’ thing with all my stamps!! Some them lay dormant for so long and I think this ‘matching set’ idea is a great way to get using stamps that don’t necessarily get a look in when I am making specific cards. These stamp sets are made to coordinate with each other so it should be quite easy to come up with a ‘set of 4’. They don’t necessarily have to be the same but they must look like they go together. Right - so, that's a little challenge I am going to set myself. might get me crafting more too - never a bad thing!!! :)

Thats it for now peeps.
Keep smiling, speak soon.
xxxx

Wednesday, 19 October 2011

Matchbox Advent Calender

I fell in love with a christmas tree shaped advent calender in paperchase last year (and being told that i wasn't allowed to spend £20 buying it) i was on the hunt for something similarlly amazing this year. i came across the advent calender from Kaiser crafts whilst flicking through the latest Cards and Papercraft magazine...i have fallen in love again!! however... i don't want to spend alot of money to then have to spend more cash on stuff to decorate it with. i had a quick look around on google and saw a few versions of a 'matchbox advent calender' and thought it was really cute (and a LOT cheaper than the kaiser one) so decided to give it a go. I'm not going to do a step by step tutorial... but i have put on lots of photos. if you have any questions, lemme know, I'll answer them as best i can.


I found using double sided tape worked really well for this project. I'm quite impatient and glue takes too long to dry. lol.


1 layer gives you 12 boxes, so for the 24 you need to make 2 of these layers. you could make this advent calender with boxes you have made yourself to give each box a bit more depth but not only am I impatient, I'm lazy too :) in case you're wondering - I gave all the matches to my friend who is a science teacher... those Bunsen burners don't light themselves!!


I found that covering each tray in paper made them very tight in their box, so I used promarkers to colour the tray so they blended in with the rest of the calender when they were pulled out.


I did originally think of using brads as tiny little handles to open each drawer with...however, I found that if you didn't have longish fingernails to get behind the brad it was quite hard to open!!! so I decided to use bakers twine looped though some holes and knotted in the front. The matchbox itself isn't made of very think card so I reinforced the front of the tray with a strip of thick board and then used my crop-o-dile to punch the holes. 


I used the same technique here for the numbers as I did for colour coding my promarkers. check out the post 'promarker and stamp storage' for details.


I used clear cellotape to attach each stack to the one next to it, I did this on the top and bottom of each set of 3. I think when I make the next one I will cover all around each stack of 3 matchboxes with patterned paper rather than just the exposed side. Although it doesn't look bad, I think by covering all sides in paper will give a neater finish.  


the top and bottom are made out of the same thick board i used to reinforce the trays, cut slightly larger than the matchboxes.


I trimmed the bakers twine down to just behind the knot, giving a neater finish - also I was finding that the longer ones were getting caught in the tray underneath when it was opened and closed :)


so that's my finished advent calender!! I have to say I am VERY happy with how it turned out.... super cute!! 
please leave a comment and let me know what you think!xxxx

Wednesday, 28 September 2011

Promarker and Stamp storage ideas...

Hello peeps!
the past couple of days I have been sorting out my craft room to try and turn my creative bombsite into some kind of organised crafting heaven :)

I have to say from the start that these storage ideas are unfortunately not my own original sparks of brilliance - they came from a discussion with some crafty friends  and from searching the internet for storage solutions! anyway - they worked for me, so I am sharing them with anyone who wants to use them!

PROMARKERS
I LOVE my promarkers but I quickly loose patience when I end up pulling the same colour out of the box umpteen times. so I have colour coded them. not a new idea, i know, but i found it really useful :)


I picked a cute star punch for the top of each pen lid. next I used double sided tape on some white card and punched out the stars. ta-da!! peel off the backing tape...sticky stars! I used the same white card that I use when stamping, so that the coloured star shows the true colour it will be when used to colour my images…


next I stuck the stars onto the flat topped promarker caps and coloured them in. i found it easier to colour the stars after they were stuck on the lid - much too fiddly when they weren't stuck down.


now all my promarkers are labelled and I can see exactly what colours they are without taking them out of the box!!! WOOOOOO!!!


also - on the side of my box I have cut out the colour chart that comes with every pack of pens and glued it to the side. I've then marked off which pens I have. useful for when I'm looking at buying new sets and need to know which ones I haven't got! :)

I think when I get more I might look into something a little more organised than my box... I found a clip on YouTube where a woman used a CD holder from Tesco. VERY good idea - take a look!!!


CLEAR STAMPS
This will work with ANY stamp that you use with an acrylic block...

I got hold of some CD cases and took the black bits out of the case (the bit the CD snaps onto) so I was left with just the clear outer bit.

I took my pack of stamps and put them into the case - the 'cling' of the stamp sticks to the plastic like it does to an acrylic block. I then numbered the case using a Sharpie.

next, I stamped everything in that case onto a sheet of A4 paper and numbered the page. I did this with all of my clear stamps, and my stamps with Kling-On foam.


I put all the sheets of paper (in number order) into a ring binder. I now have a very organised number system for my stamps. The chaos that was my stamp drawer is now a very nice looking set of 3 boxes on my shelf. I bought the boxes from Instore for about £3 each. each box holds 20 CD cases.


since doing this I have found that I use SO many more of my stamps - before I only ever used the stamps on the top of the pile... I had NO IDEA what I had. now I have a quick flick through and I can see everything I own... and the actual stamp size too!! UBER useful!

I have also done a few pages in the front of the ringbinder for my embossing folders too... it's nice to know what you have and what it looks like so by having pieces of the embossed paper in the folder it makes it a quick easy reference.


really hope these ideas are useful - they were for me :) lemme know if you have any crafty storage solutions too - post a link or a piccy! always looking for ways to make my crafting life easier! :)


That's it for now... will have to tell you about my scrap box solution another time!x
keep crafting - speak soon.xxx

Saturday, 24 September 2011

Tattoo Themed Cards...

hello lovelies!!
have had a good week - got cracking with my xmas stock last weekend and got quite alot done!! well, 20 cards done. but that means that I only have 80 to go!! :) shouldn't take that long! *giggles nervously* if only I didn't have a full time job to get in the way of all my crafting!

I've been playing with biggy ALOT since I got back from holiday...suddenly all those dies and embossing folders I have actually work and look good!! it's nice not to have to pack underneath them with pieces of paper to get the right thickness. as a treat I bought myself 3 sets of the Sizzix Framelits.... LOVE them!


I bought 'Fancy Labels' , 'Tickets' and 'Circles'. I would personally say that the circles have moved their way into my 'essential' crafting kit!! I can't remember how many times I have tried to find something round to draw around... its either too big or too small...then there is the issue of cutting them out! never very circular when I had finished with the scissors!! these Framelits are AMAZING and I WILL be buying the other shapes when payday rolls round! :)

  
I had a nice break from xmas stock today - had an order for a male birthday card - theme 'tattoo'. I have some awesome tattoo stamps that I bought from Artful Splodger however, I felt the main stamps were a little too girly for my central image so created my own tattoo image. I used the star stamp from the Bombshell collection for the star banner at the top. I downloaded a free tattoo font from the internet and printed out the 'happy birthday' onto the same paper as I used for the background. 


I then cut out some wings and the heart and used foam pads to give the card some dimension. for a final touch I added a ruby coloured gem to the heart. I am VERY happy at how this card turned out - so much so I am gonna knock some more of these out and take them to the craft fair in December!!! there is a definite gap in the market for these tattoo themed cards!!! 


I do love my Bombshell Stamps to pieces so I thought I would show you some of the cards I have made using them - I love the retro tattoo look... lemme know what you think!


well, I think that's about it for now. 
keep smiling, keep crafting, speak soon.xxxx